What is a mud room?
Mudrooms have become quite common in today's modern housing. And in my opinion, almost necessary. They provide a nice transition space between the rugged outdoors and the comforting warmth of the home. Young families especially have so much stuff that we need a place to shed our layers when we come through that door. And don't even think about having guests over, as they stand in the doorway wondering, do I take off my shoes? Where should I put my coat? As they secretly find a chair or quiet corner to stash their stuff.

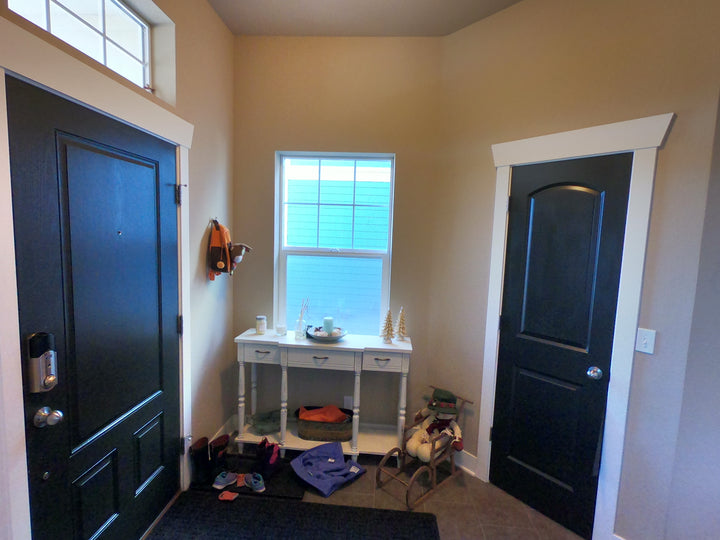
Our home was no exception. The front door entryway features a small space behind the door as well as a corner coat closet which easily becomes the famous avalanche of sh*t falling on you each time.

Needless to say, often times backpacks, shoes and coats make their way into the house leaving a trail right to the culprits sitting glued to the tv after school.
We are fortunate enough to have another mudroom by the back door of the house, just off the garage. But it's even smaller and already overrun by this family of 5.

It's finally time we do something about it and get this space under control once and for all. I've decided to go with a built-in look to really maximize the space and make it feel intentional and inviting for guests.
I take the project through an 8-step framework which I'm going to share with you now. Soon you will be able to download a copy of our worksheet which is designed to help you complete your projects.
The 8 Steps are: Prep Work, Planning, Inspiration, Sketching, Material Selection, Scheduling, Execution, Celebration
PREP WORK
This is what I want my project to accomplish: I want to create a space in the entryway of our home that is warm and inviting. It should also be intuitive for everyone that enters to know where to put their shoes, coat, bags etc...
My project will be a success IF: I create a welcoming mudroom, free of clutter with plenty of storage for shoes, coats, and bags. I increase my woodworking skills
When I look at my end result I want to feel: Proud
This is how I want my project to look (i.e. rustic, modern, vintage, clean, colors, shapes): Upscale, fancy, luxurious, built-in, blue/gray, yellow, white, wainscoting, crown molding, vintage hardware.
Who will this project impact: Me, my wife and 3 kids, and everyone who enters our home. Everyone will have a place for their things.
Why is this project important: When entering or leaving the house, everyone should feel organized, free of clutter. Because the kids go out the front door the most to go to school, they need a place for their things.
PLANNING
coming soon...
INSPIRATION
coming soon...
SKETCHING
coming soon...
SHOPPING FOR MATERIALS
coming soon...
SCHEDULING
coming soon...
DAY 1
It's finally time to start building. My favorite part! All the anticipation and anxiety thinking about all the little details and questions left unanswered, don't matter anymore. This is called Just In Time Learning. I only need to know enough to take that first step. And today it's all about demolition and wainscoting. Check it out!
DAY 2
Today I finished installing the wainscoting and began constructing the pocket wall box. I found one on Amazon that I liked, but I wanted to make it myself so that I could customize the dimensions.
I ran into some trouble drawing out my cut lines. I started to second guess my design halfway through. The initial drawings I did had the box only 2 inches deep at the top and bottom. I realized that this would not be big enough and so I had to change all my measurements to increase it to 4 inches deep. So I had lots of erasing and re-drawing.
Today I remembered that I suck with the jigsaw. At times I was pushing too hard which caused the blade to angle sideways. A scroll saw would have been a much better tool because the blade is locked in place on top and bottom. So I ended up having to use the table saw to fix my crooked edges. Then I used the multi-tool for the finer detail cuts. Lastly, I sanded it down real good.
I didn't get the box done like I had planned today. I only cut 1 side of the box. I always like to end my day feeling like I have accomplished something or at least have everything prepped for the next day so I can hit the ground running. So I decided to draw out my cut lines for the trunk and bench.
Here's day 2.
DAY 3
I started today with a recap of the train wreck that was yesterday. I've got my sh*t together today and ready to rock.
Today I'm finishing up the other side of the wall storage pockets. Then I jump right into cutting all the pieces for the trunk and bench. I'm building the entire thing out of 1 sheet of MDF. Lots of cutting today and I even had time to begin the assembly of the trunk.
MDF is so much easier to work with for these large pieces I'm cutting. It's not great for wet areas, but I don't expect too much water around it. Just in case I'm using an exterior grade paint on the trunk and bench then I'll finish it off with a waterbased poly coat.
Check out day 3
DAY 4
Today is all about the assembly of the wall pocket storage. This thing was tricky to build. I'm sure there is a much easier way and I could probably do it better the second time around. But I learned a ton doing it.
I started the day off with measuring out my cuts for the bench and making sure the pieces for the truck will fit together nicely. It was a nice little warm-up before tackling the wall pockets.
Here's day 4
DAY 5
Well, today was supposed to be my last day. I was over ambitious with my schedule. We are hosting Christmas at our house tomorrow and the entryway is a total mess. I need to finish up the bench and rough everything in before people start showing up.
I ran into a little design flaw part way through. I thought I would simplify some cuts and just screw the trunk to the wall. The problem is that the trunk doesn't have the 4th side to make it square. I don't want it to move around so I need to add extra support across the back.
I ended up cutting the bench seems at 22.5-degree angles so when you lift the trunk lid it's not a hard 90 corner that will just get beat up and pinch fingers. I also added a decorative routered edge to the front of the bench. I think it made a very nice touch of elegance and will go nicely when I add the crown molding shelf up top.
I don't have a router, but I do have a Roto-Zip which can hold most router bits. I've used it before on a small project but this is the longest thing I've cut before. It did a pretty good job. Not as clean as a router would have been, but it adds some character to it.
Watch day 5 below... (oh yeah, the House music is inspired by my late night painting. It gets me into a good flow)
DAY 7, 8 and 9
Getting closer... Lots of small details to work out now. Painting, sanding and making sure the trunk lid fits properly and the 3 pieces of the bench all line up.
I noticed the piece I attached the hinge to didn't have enough support and was just a small piece of wood so I used the Kreg pocket hole jig to help screw it down to the rest of the trunk box.
After I finished on day 9, something terrible happened and caused me another week delay. Keep following to see what unfolds...
DAY 10
The day after Christmas, our whole family came down with the flu including our 10-month-old baby girl. It was horrible. My oldest daughter got it first and then I started to feel it coming on as I was finishing up the work in the last video. I quickly went into cleaning mode, got the entryway cleaned up and made room in the garage for the family car.
My Mom saved the day. She came and took care of the kids while the adults were sick. We are so lucky to have her!
I bounced back pretty quick. I'm ready to get back at it today. I'm still using that same sheet of MDF to cut out all the pieces. Watch below as I make the board backer for the coat hooks and the crown molding shelf.